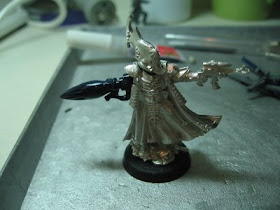
We had our semi-annual mega battle last weekend. It was a load of fun. We had 6 guys per side, each with 3000 points. Orks vs imperial and Eldar. My Revenant ended up being MVP of the match. He dropped the Gargant 2nd turn after the imperials dropped his shields. In one turn he took 8 structure points off the ork monstrosity. Next he gave a squigoth 4 wounds. Then he turned and dropped a Stompa. After the Reaver was destroyed by the gargant, a stompa, a ork dreadnought and a few other things, the Revenant took the last structure point off of the second gargant. The only target left was an ork gibbletgrinda which he destroyed in one turn. His eldar shields saved him about 8 times from any harm.
My converted nightwing did well too. It is fun to be able to move it wherever you want to take something out. Most people want to be able to destroy something for sure instead of taking a pot shot at the nightwing. His eldar holofields saved him a couple of times as well. Gotta love the holo fields. It was a lot of fun, everyone was a great sport and a lot of things blew up. What else could you want in a 40k game?
Friday, December 18, 2009
Thursday, October 15, 2009
Wave Serpent Prototype
Here is my 80% complete Wave Serpent. I usually like to get things almost done, and then let them sit on the shelf while I hem and ha over how to do the finishing touches. I want to add some freehand, either keeping with the eagle theme I have on other models, or go with a dragon/serpent theme since it is a wave serpent. I like to paint a prototype to completion before doing a whole squad. Each time I paint a model, I learn a lot about the paint I am using, and what works and what makes things take forever. Once this one is done, I have four more tanks to paint in an assembly line. I also am trying to figure out how to add some sweet banners to the tanks. Banners used to be a lot bigger about ten years ago, but I still likes me some banners.
In taking this picture, I realized that my little, old, point and shoot canon A520 takes better miniature pics than my $1000 new camera. ( I probably need to just figure out the new one).
So here is a better pic of Karandras too where you can actually see him. (CLick on pics for Ultra Zoom)
Sunday, October 11, 2009
Man Cave
I'm Royce's little brother, Aric. I followed his advice and made my own office by cleaning out a storage room. Here it is. I finally have a space where the ankle biters won't invade. I have 4 armies. Black Templar, Orks, Tau, and Imperial Guard. I'm currently working on some lizard mounted rough riders. I should have some pictures up soon.
Tuesday, September 15, 2009
Karandras finished
I finaly finished Karandras. I also finished the exarch's chainsabres. I really liked the way these guys came out. Really easy to do, and quick to finish. I used graveyard earth on the shoulders, washed with devlan mud, then highlighted with graveyard earth, and then a final highlight with devlan mud mixed with sunburst yellow.
Tuesday, September 1, 2009
WIP Karandras
click on image for extreme close-up
Here is Karandras that I have been working on over the weekend. I love the paint scheme. I think I will paint my Tyranids in the same colors. Still need to do some finish work and of course the base. I wanted to tone down the monstrous mandiblasters and paint him in a dark, shadowstalker-esqe paint scheme. I can't see someone being a shadowstalker with bright yellow and green armor. Thats how I saw him at least. I like how the brown shoulder pads turned out. It makes the armor look ancient. I still need to do gem work, and more finishing on the black and dreadlocks. So far so good.
Saturday, August 22, 2009
Dire Avengers
I finished my squad of new dire avengers and then finished four old style to bulk my squad up to ten. The exarch has magnetized arms for weapon swapping. Its really tough to match a paint job that was completed over 17 years ago. You can tell which of the old dire avengers are the old, and which are the new. I has always really liked dire avengers and think they fit well with an Alaitoc army.
Monday, August 17, 2009
Space Hulk
Although I am an eldar player through and through, I think I will have to break down and buy the new space hulk game. The models are beautiful, and I loved playing the original space hulk in the early '90s. I think it would be a great game to play with my 9 year old son, and would be a great game to introduce people to the hobby. Check it out at the GW website : http://www.games-workshop.com/gws/catalog/productDetail.jsp?catId=cat180018a&prodId=prod210009a
It looks like it is going to be great. You get those amazing Blood angel terminators, and some awesome genestealers. I might get a chance to use my original space hulk tyranid warriors.
I am excited about the objectives as well. Looks to be a great game. Good job GW
It looks like it is going to be great. You get those amazing Blood angel terminators, and some awesome genestealers. I might get a chance to use my original space hulk tyranid warriors.
I am excited about the objectives as well. Looks to be a great game. Good job GW
Tuesday, May 26, 2009
Wraithlord #2
Here is my second new style wraithlord. I always liked the kneeling rangers and Tau firewarriors. I thought a heavy weapon wraithlord would be great kneeling with the gun-grip hand. I cut the leg off just below the kneecap and pinned it. I have found that the pin vise works better than the dremel for pinning plastic figures. The plastic is so soft that it tends to melt with a dremel and give you a horribly large hole. The pin vise works great if you have a wire and drill bit that are very close to the same size.
I also put the back wings in a lower position as if they were articulated and he had them down for ballance.
Converted nightwing part 2
I have spent some more time on the nightwing. Plasticard is harder to use then some people make it look. There is some great work out there on the web. I had a lot of work to do to get the nightwing nose mesh with the star trek model ship. Its coming along. I made magnet mounts for the shuriken cannon and brightlances. I definately need a new base as well. Again I am hoping some green stuff magic will fix it all up. Any ideas or suggestions would be greatly appreciated.
Revenant titan part 4
I am attempting to make some custom pulsars for the big guy. I drilled out inside the sonic lance mount, and glued them inside. I then put the magnets on the end of the new pulsars with green stuff. The hard part was making sure that the pulsars were pointing the direction I want them to. So I positioned them and let it set overnight.
I may redo the pulsars though. They are not quite done. They are made from my son's old suction-dart arrows that he no longer plays with, and sections of pens. I am going to fix 'em up with some green stuff and see if that does it.
Monday, April 13, 2009
Revenant titan part 3
I have finished the head and the sonic lances. The lances I painted scorched brown, drybrushed shining gold, and then washed with a dark walnut wood stain. (Ace hardware brand-I think it smells better than other stains.) It give a good antique metal look.
Next I painted the pilot. He was harder to paint than I thought he would be. Oh well, most people won't even see him. He's done, thats about all I can say.
I wanted the head to compliment the work I have done on the shoulders, draw attention to itself, but not be too over the top. I have always liked star patterns for Eldar, who are the masters of the webways. I used a technique that works great for freehand painting. I drew the pattern out in pencil, painted it in, and then drew the center circle with black, fine tip sharpie. I also used the sharpie for the transition from the white to blue on the face. I still have some finishing touches to do, but he's almost done. (click on pics for closeup)
Magnetize your wraithlord
I put together my wraithlord a few months ago and thought I would only ever use the sword. After a few games, I decided that flexibility is always a plus. I already magnetized the weapon mount on the shoulder, and thought it would be great to have the option for two weapons. I took off the other shoulder mount months ago, and thought I would replace the sword hand with a gun hand. Luckily I pinned the sword hand on, and the super glue didn't work too well.
Next, I pulled out a nail we use to hang pictures in the house with a nice, broad head and cut the nail off to about 3-4 milimeters, drilled a hole in the hand, and glued it in. The magnet on my gun still seemed to spin around too much, so I put another head just in front of it. Looks like two heads are better than one.
Now I can mount whatever gun I want on this bad boy along with the shoulder mount. Now to paint him. (click on pics for a closeup view)
Friday, March 20, 2009
Magnets pt 2
I had a question about the size of magnets I use which is vitaly important. I bought my magnets from K&J magnetics. It took me three orders before I got the right size of magnet. The smallest I got on the top of the pile is 1/8" x 1/32" work great for figure arms. One magnet on the arm/weapon, and one in the model works great.
The next size up I use is 6mm x 2mm. I used these for magnetizing weapons on my warwalkers. I also used one on the weapon and one on the weapon mount. These are pretty powerful, and just a magnet and a nail or screw would have probably worked better. I have broken my warwalker putting these weapons on, you have to be pretty careful.
The largest size, I have yet to find a use for. These things would hold your nine-year old to the kitchen fridge. Getting two of these apart is rather hard. I will definatley use a nail or screw with the magnet for these larger ones. I was planning on using them for turrets or something.
I have loved using magnets on my models. Whenever I play a game, I can switch out the weapons. It does make painting take a little longer though.
Time Part 3
Here is 15 minutes of Blue highlighting:5 minutes fixing the brown
15 minutes doing detail work and fix-ups.
and 10 more minutes on the base for a total of 1 hour 55 minutes for a finished Phoenix Lord ready to slice open some Marines. I felt like taking phoenix lords for a 2000 pt battle may be overkill, but when you see a lot of named Marine characters out, then its time to bring out the Phoenix Lords. We'll see how she does.
Tuesday, March 17, 2009
Fun with magnets
One of the hardest things to do is to glue a weapon choice onto a leader that has the option to have multiple different weapon options. Magnets Rule. Now you can give your character a diferent weapon each day. My wife says its just like barbie how you can change her outfit. Uh-huh. Exactly.
I like to start the hole with a large round bur and clean up the edges with a conical bur. These are dental burs and work great in a dremel.
Once the hole is big enough, I always dry fit it with the magnet on the end of a file.
Once it fits, then I place a small bit of green stuff in the hole, and force the magnet on top. Green stuff works 100 times better than super glue for magnets.
Then I place a second magnet on the first, making sure the polarity is correct, and then put green stuff on the weapon arm, and push it onto the magnet. This pulls the magnet off, and then I shape the green stuff on the weapon and magnet.
Rinse and Repeat and you have all the weapons you need for your model.I like using two smaller magnets, especially on metal figures. I end up cutting away too much figure, or not enough pull with a nail or screw head and one magnet.