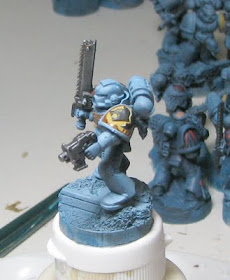
Here is a pic of the final shoulder pad that I shaded with the brown marker.
Space Wolf shoulder pad before.
Shoulder pad with one single brown line around the edge. Some people may just leave the pad like this, which looks good.
Extra ink for shading.
I also found that it worked well to add a dark line around the edges of tanks. Paint is hard to get a constant line. With a marker, you can get a very precise, even, dark line around the edges.
You can see where I did it on this rhino.
Another WIP rhino. I found that the orange marker gave a good light brown color on top of the blue. I tried the brown, and it looked too black. I like the non waterproof markers, because then you can fix any spots where you go too crazy, and can blend if you like. My wife has some permanent ones that I may have to 'borrow' for some tests.


Dude, I love it. That army is really coming together. Where do you get the pens? How much do they cost? What size again?
ReplyDeleteAric,
ReplyDeleteThanks, Check the last post. They are from Michael's, cost about $15, are .33 mm tips. There is a picture of them on the last post.